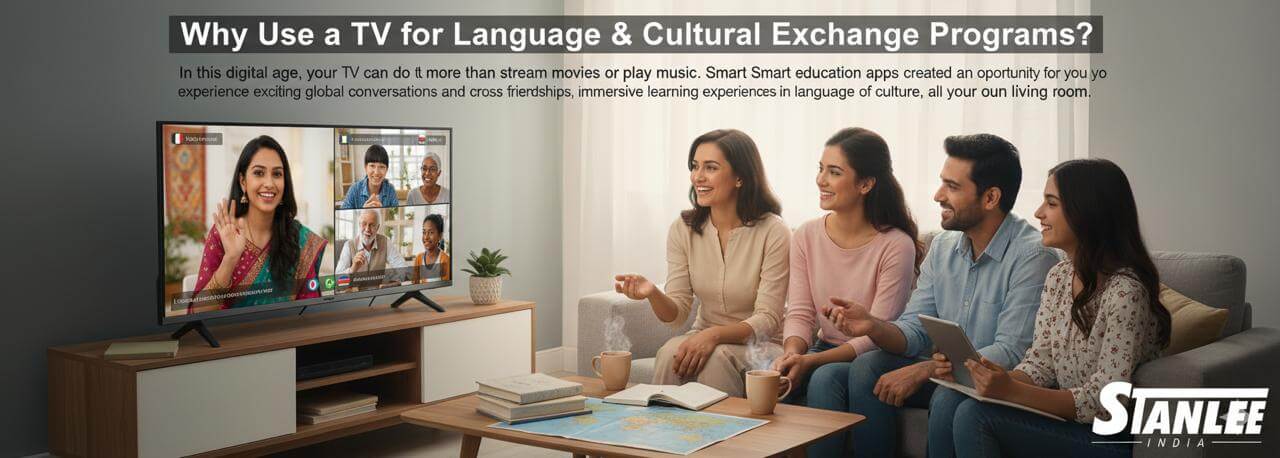
Getting a new TV is always a thrill—especially a Stanlee India LED TV designed to create world-class images and the latest technology available from 32 inches to 98 inches
But we understand that getting it set up technically can be a tad bit daunting for most people.Don’t stress—we will break this down and make it easier for you.
Simply follow the easy, step-by-step guide below to get your Stanlee India LED TV set up.
✅ Step 1 – Unboxing
Unboxing your Stanlee India TV is technically the first step in an easy process. Inside your new Stanlee India TV box, you will most likely find:
- 📺 LED TV unit
- 🎮 Remote with batteries
- 🔌 Power cable
- 🪛 Table stand/legs with screws
- 🧰 Wall mounting kit (if included with your model)
- 📘 User manual and warranty card
📦 Pro Tip: To avoid putting scratches on your new TV screen while assembling, keep the screen side down on a soft cloth or foam sheet.
🔧 Step 2 – Where Do You Want It: On the Wall or On the Table?
Stanlee India TVs look great on the wall or on the table.
- Wall Mounting:
If you have the wall mounting kit included with your purchase, it is best to use it. If not, buy a good universal wall mount.
Not confident? Hire a technician to drill and mount your TV while you sit back and relax. - Table Placement:
Secure the legs or stand using the appropriate screws and tighten them completely to avoid wobbling.
📍 Find a place that has good air ventilation and is away from direct sunlight.
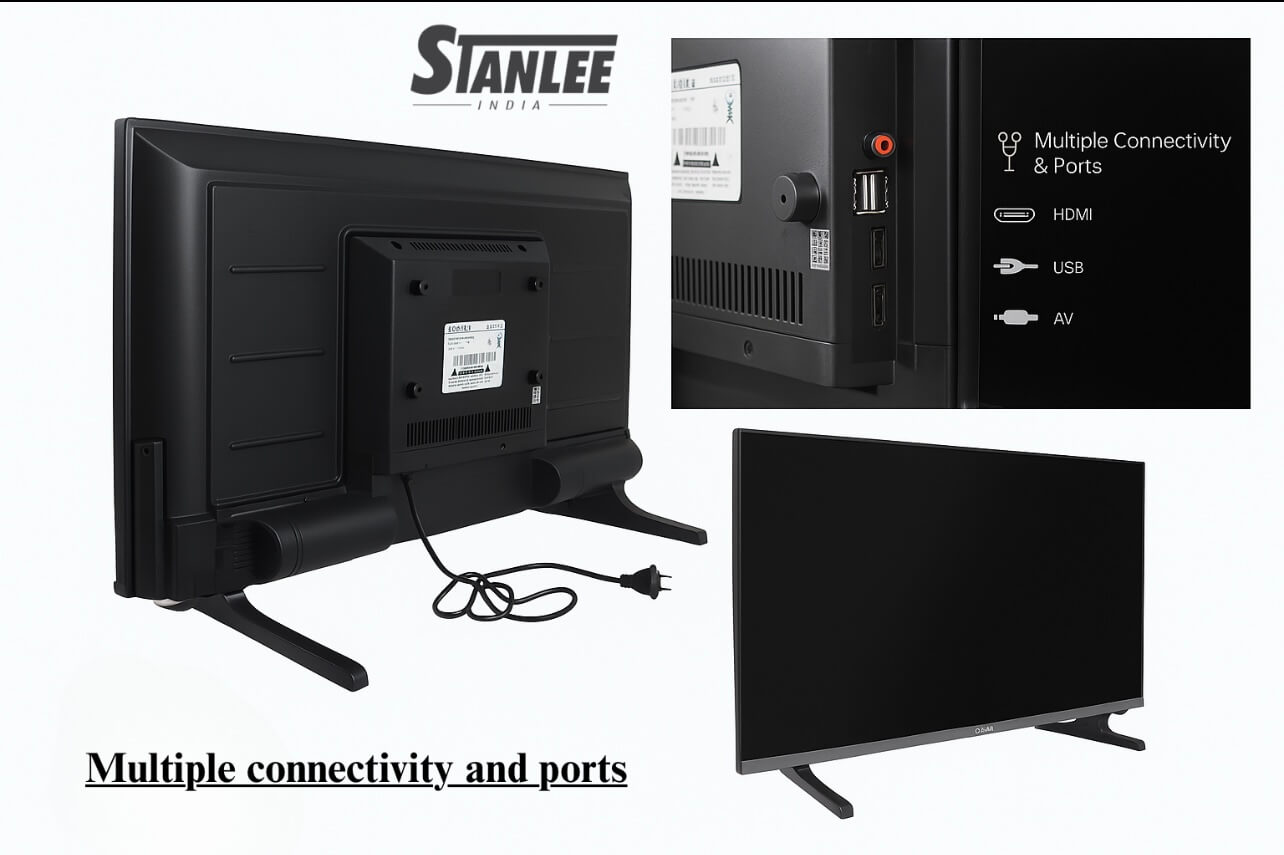
🔌 Step 3 – Connect Power and Devices
Now it’s time to plug in your Stanlee India TV to an electrical outlet, but do not turn it on yet.
First, connect your external devices:
- 📺 Set-top box (HDMI or AV)
- 🌐 Wi-Fi router (if Smart TV)
- 🔊 Soundbar/Home Theatre
- 🎮 Gaming consoles / USB drives
🎮 Stanlee Tip: Always use high-quality HDMI cables for the best results.
📶 Step 4 – Power On and Language Selection
Now, turn on your TV using either the remote or side button. You will be taken to the first setup screen:
- 🗣️ Select the language you prefer
- 🌐 Select your Wi-Fi network
- ✅ Accept Terms & Conditions
- 🔐 Log in to your Google Account (Android models only)
🌐 Stanlee India Smart TVs provide a completely seamless pairing process.
📺 Step 5 – Channel Scan and Display Settings
If you connected the set-top box, you may skip channel scanning.
For cable or antenna:
- Go to Menu > Settings > Channel > Auto Scan
- Let it scan and store channels found.
Adjust Display Settings:
- 🖼️ Picture Mode: Standard, Cinema, Vivid, or Custom
- 🌙 Brightness/Contrast: Adjust depending on room lighting
- 🔊 Sound: Choose Surround, Clear Voice, or User-defined
🎨 Stanlee’s picture calibration ensures accurate colours and sharp details from Day One!
📱 Step 6 – Download Your Favourite Apps
For Smart TVs, open the app store and download your favourite OTT platforms:
- 📺 Netflix
- 📦 Amazon Prime Video
- 📹 YouTube
- 🎥 Disney+ Hotstar
- 📲 Zee5, SonyLIV, etc.
📲 Stanlee India’s interface is fast, clean, and designed for Indian families.
🛡️ Step 7 – Register Warranty & Enjoy Smart Features
Before you start binge-watching, don’t forget to:
- 📝 Register your product online for the Stanlee India warranty
- 🧠 Explore smart features like screen mirroring, voice assistant, and parental controls (based on model)
💬 For help, reach out to Stanlee India‘s real-time support team.
🏁 In Closing
Delivering and installing a new LED TV doesn’t have to be difficult—especially with Stanlee India, a TV made for ease of use and exceptional performance.
⏱️ In just 30–40 minutes, you’ll be ready to enjoy:
🎬 Blockbuster movie nights
🏏 Sports thrillers
🕉️ Devotional content
All in HD or 4K brilliance.
Stanlee India is not just a TV brand—it’s technology made in India, for India.
🛠️ Need Support?
Our qualified trained technicians are available across India.
🌐 Visit www.stanleeindia.com or 📞 call our helpline for quick assistance.